It’s been pretty cool to watch Ceramic Materials Workshop develop into what it’s become. Matt and Rose Katz are building an amazing thing, and their list of glaze disciples pushing the envelope of glaze magic has grown steadily. I’d planned to become an initiate myself and take the October class… but life on a remote island in Southeast Alaska has it’s own demands on my time, attention, and energy. That said, I just got this info from CMW in my email, and it looks great – certainly in line with what Ceramic Action is all about. I’d encourage you to check it out, you can not go wrong. You can even use the code CMWRULES and get the whole shebang for 75$ (Less than the cost of my average bar tab)!!!
This self guided workshop is a comprehensive, 54 part study into Mid-Temperature glazes. Also known as Cone 6 or Cone 5-6, these glazes are one of the most popular firing temperatures in ceramics. They can be beautiful, enticing, engaging and incredibly frustrating. In this workshop we will explore in depth, what we know to make the most out of Mid-Temperature glazes. We will take the mystery of materials, formulas and firings and translate them for real working artists.
Matt was born in Carbondale, Illinois and grew up in Southern Indiana. In 1999 he was introduced to ceramics in high school. Matt earned his BFA in Ceramics and Art History from Indiana University in 2007. During this time he spent significant time living and traveling in China, studying the history and technology of Chinese porcelain. After graduating from IU, he spent several years living in Seoul, South Korea. Before coming to Graduate school at USU, Matt was a ceramics artist in residence at the Armory Art Center in West Palm Beach, Florida. He was the first recipient of the USU X-STEM fellowship, and his research involves material science, geology, and ceramics.
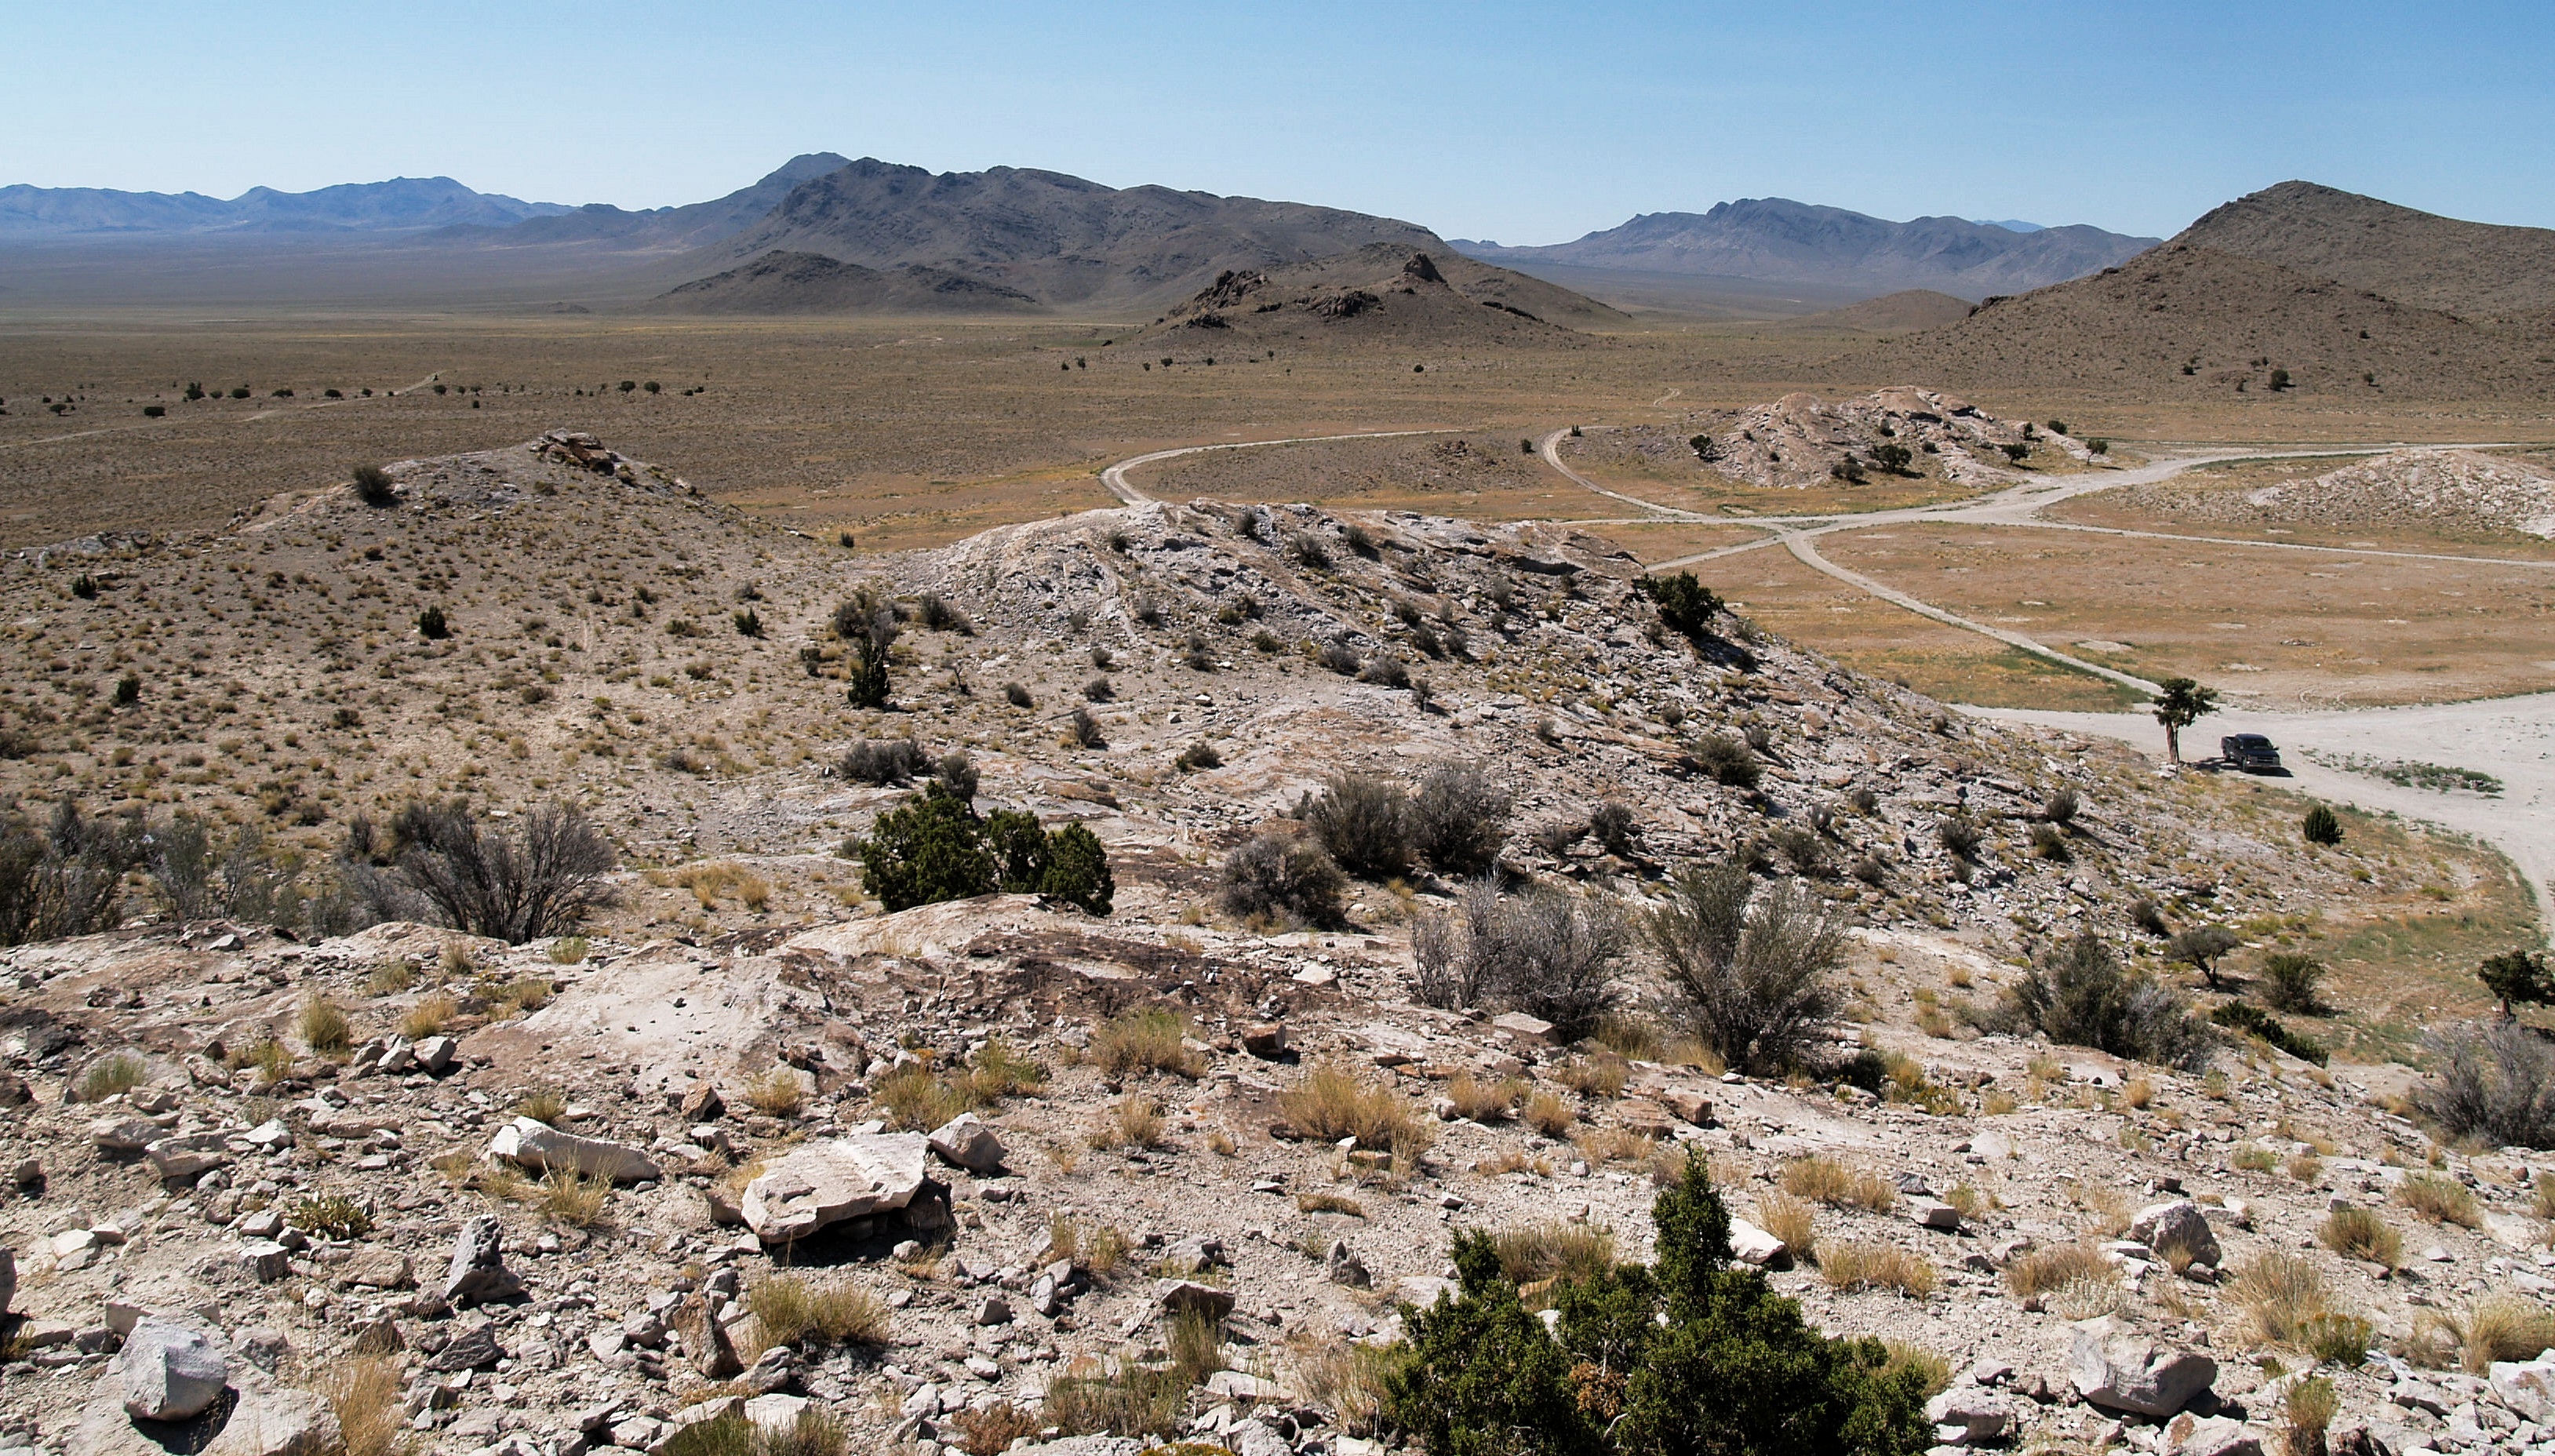
Exploring Cook Canyon, UT
Artist Statement
Daily life plays an important role in what I make and why. The needs of the kitchen and home are for me, like many potters, a useful starting point for conceiving specific utilitarian forms. I make a lot of cups, bottles, and drinking vessels. Lately I’ve been interested in the idea of designing and making these vessels in sets. For me, there’s nothing better than gathering with a group of friends, eating, drinking, and using handmade ceramics. I’m motivated to make objects that enhance these experiences and enliven domestic spaces.
My work explores the intersection of ceramics, material science, and geology. In my mind’s eye, glaciers give way to icy celadon glazes, volcanoes ooze magma as molten glazes cascade down curves and roll off edges, crystals grow and forms take shape when conditions are right. I’m an avid rock hound, and for the past three years I’ve explored the mountains and landscapes of Utah, Idaho, and Montana. There are many gemstones that have analogues in ceramics – and much of my research has been centered on studying and understanding the underlying science of materials and firing processes. For me there is something incredible and romantic about the idea of transforming rocks and dirt into beautiful things.
In the end I strive to integrate my desire to make utilitarian pottery with a love of materials and nature. What drew me in and keeps me interested on a daily basis are the endless variations possible in ceramics. The idea of constantly searching for new possibilities is at the heart of who I am and why I do what I do. At the same time, I love the constant challenge of pairing forms and surfaces, sourcing from the history of ceramics as I source materials from my local surroundings. I think my strongest work finds a balance between all of these ideas, and my hope is that my work evokes a similar curiosity in the people who see and use it.
Exhibition Statement
Pyrosynthesis: n. synthesis or creation initiated by or resulting from the action of heat.
I like to joke that I’m equal parts artist, pyromaniac, rock hound, and nerd. Add to that an interest in history and technology, along with a penchant for experiments and testing, and it describes who I am and what I do quite neatly. As a graduate student in ceramics at Utah State I’m in the perfect place to satisfy all of these interests. For the past three years I have specialized in the transformation of common raw materials into ceramics through the action of heat and fire – hence the title. There are a lot of parallels between what I endeavor to do, and what the alchemists of ancient history sought to do, namely to turn lead into gold. In my case, I’m interested in the transformation of locally abundant rocks and dirt into objects of beauty and interest.
This exhibition, then, is a culmination and presentation of my work on this subject. To explain it simply, all of the work in this gallery has at least one component of a prospected (dug up or picked up off the ground and drug back to my studio) material utilized in the finished piece. The best example is the granite bottle and cup set on the granite slab. In this piece, the glaze is made entirely out of the finely ground up granite rock dust. Coarser granite rock particles were incorporated into the clay body, thus providing black speckles on the unglazed clay surface. The base, too, is a broken granite boulder that has been cut and polished flat to provide a stone surface for the ceramic objects to live on. My hope with these combinations is to draw a direct connection between the ceramic object and the materials they come from. For me, the novelty of melting rocks in a ceramic kiln never gets old – each experiment generates still more new questions than answers, and Utah has been an amazing place to find all kinds of interesting materials. I’ve included 9 of the most interesting materials that have captured my interest.
Starting just to the right of this statement, I’ve included several piecess to help give context to my process and research and shed light on how the finished pieces come about. I should mention, too, that I took all of the 2 dimensional images with the Scanning Electron Microscope here on campus. I often study my experiments and tests for a long time before they end up on finished pots, and the SEM has given me the ability to analyze and learn about the materials and firing process in a way that I still can’t believe. Not only are these images a wealth of information and data, but from an artistic standpoint, I see them as dramatic landscapes and images of incredible beauty. Finally, the pots themselves are at the heart of everything. Over the course of my graduate studies at Utah State my sense of design and craftsmanship has been challenged like never before, the result of which is a body of work that is hands down the best I’ve ever made. Thanks for coming in and having a look around.
Local Materials
Local Materials/Making a Glaze Piece
From Top to Bottom, Left to Right.
Manganese Saturated Kaolinite/Halloysite from near Eureka, Utah.
Manganese is a very interesting element, and provides some wonderfully interesting surfaces. In certain conditions it can yield dramatic rainbow iridescence. Small additions account for the optical phenomena in the iridescent Hare’s Fur Glazes as well as the Manganese Saturate Glazes.
Quartzite from Willard Canyon, Near Brigham City, Utah.
This is a rather interesting flavor of Quartz, having trace amounts of Chromium, which accounts for the lovely green color. It provides a very high concentration of Silicon Dioxide (glass) in glazes. It was used in the dark green Basalt Celadon glazes.
Dolomitic Limestone with Calcite from Dry Canyon, Logan, Utah
The first material I began experimenting with at Utah State, this material is used in glazes as a glaze flux – which is to say, it’s a material that lowers the melting temperature and promotes flowing, dripping glazes. It’s used in all of the black Oilspot and Hare’s Fur glazes.
Travertine from Porcupine Reservoir, Utah.
I picked this stuff up not knowing what it was, but fascinated by the texture. I later learned what it was and that it formed in chaotic hydrothermal conditions, you could think about this material as nature’s very own hard water deposit. Similar to the Dolomite, it acts as a flux in glazes. It was used in conjunction with the Dolomite and Quartize on the bluish grey teapot.
Black Schist from Willard Canyon, near Brigham City, Utah.
Essentially a metamorphosed clay or shale, this flavor of slate contains some really beautiful pyrite (fools gold) inclusions. By itself it is refractory and unappealing, but with a 10% addition to a celadon base glaze, it provides a beautiful sky blue. You can see the blue and the pyrite inclusions on the blue bottle set.
Topaz bearing Rhyolite, from Topaz Mountain, Utah.
This stuff is just amazing. High in Silica and Alumina, it also speckled with Topaz gemstones (mostly very small in scale – this sample is exceptional). It’s features in all of my Basalt/Rhyolite glazes, which I’ve named Fiske Lava Oilspot. The recipe? 3 Parts Rhyolite, 1 Part Basalt. See the small test tiles for what it looks like fired by itself.
Granite from Cook Canyon, Near Willard, Utah
Plain old granite. It turns out this stuff makes a beautiful range of glazes completely by itself. Its used as a glaze on the 2 Tiered Granite Slab piece, and it’s used in the matte black glaze on the set of 4 cups on the smaller granite base. The matte black comes from an addition of 1 part Hematie (Iron Ore) to 4 parts Granite.
Vesicular Basalt (Lava Rock) from Sid Butte, Idaho.
The local geology abounds with basalt of all flavors, but compositionally, they’re all relatively similar – at least as far as my glazes and firing process is concerned. This specific variety got me started on researching basalt glazes, and when I started using the lava oilspot glazes I incorporated local Utah varieties from outflows near Delta, Utah, as well as roadcuts off in Box Elder County, Utah. It accounts for the rich reds and oranges in my Lava Oilspot Glazes.
Iridescent Hematite from near Eureka, Utah
This spectacular sample survived my hammer and the studio milling equipment. It’s nearly pure iron. Less spectacular examples have been incorporated into all of the Iridescent Hare’s Fur Glazes and Black Oilspot Glazes, as well as the Black Granite Cup Set.
A glaze is nothing more than a glass-like coating fused to a ceramic surface by heat.
Nearly any rock or mineral can be utilized in a glaze. Most ceramics studies are stocked with materials that have been mined and commercially prepared for consistency and ease of use. But you can easily dig up anything and see what happens, sometimes it’s not at all useful for ceramics, but sometimes it is – and these are wholly unique to the place you get them from.
The first thing I do when I bring back a sample (1a,1b) to my studio is to use my trusty sledge hammer to break a small sample into pea-sized gravel. This gravel then goes straight into a small bowl (1c), and straight into a kiln. After this initial firing to 1250C (2350F – that’s HOT!), I can usually get a very good idea of what a sample might do in glazes. I might not have any idea what a material is – but after firing it, you can tell how it will behave at standard ceramic temperatures. Sometimes one gets lucky (as was the case with the granite) and ends up with a material that makes a perfectly acceptable ceramic glaze all by itself. Usually though, it takes some testing to find out how to fire specific materials.
Because the atmosphere in the kiln has an effect on the color of the glazes it’s useful to do initial melt tests in an oxidized (regular atmosphere) firing (2a) as well as firing the material in a reduction (excess fuel, reduced oxygen atmosphere) (2b) The firing atmosphere changes the color of the clay and the material quite significantly. My Oilspot glazes rely on regular atmosphere firing conditions for the phenomena of oilspots to occur. Celadon glazes, on the other hand, require reduced oxygen conditions for the iron to change from it’s oxidized (rust!) red color, to a reduced black color. These tiny black iron molecules are what make my celadon glazes appear blue.
(3) is a sample of granite melted at 1250C. Right away I could tell this was going to be a great material to work with. With no additions it’s good to apply directly to pots as soon as it’s milled. The liquid in (6b) is pure granite glaze.
(4) is a sample of Black Schist melted at 1250C. You can see that this sample needs to be amended or mixed with another material to make a useful ceramic glaze.
It can be useful to fire samples at lower temperatures to find out when exactly they start to melt and fuse to a clay surface. (5) is a sample of basalt fired to about 1000C, which was hot enough to affect the iron in the basalt, but not enough to melt the bulk of the other minerals present.
After establishing that a rock is going to be useful, it’s time to begin preparing it for use as a glaze. A 15 pound (bowling ball sized) hunk of rock will provide about 5 gallons of glaze. 5 Gallon buckets are a standard in most studios, and I used about 5 gallons worth of glaze to finish all of the black and Hare’s Fur Oilspot pieces in this exhibition. Making a rock a glaze material is a rather simple process of using a hammer or milling machine to crush rocks into fine powder. My favorite way to do this is to use a ball-mill, which is essentially a heavy-duty rock tumbler. To a tightly sealed metal jar you add: 3 Parts material, 3 parts water, 4 parts porcelain balls(6a). Put this jar on a machine that spins, and in about 24 hours it does the job that takes Mother Nature millions of years (who is constantly turning mountains into clay). The mill works by mechanically mixing and breaking the material into finer and finer pieces. Your done when the material (6b) passes through a fine mesh strainer. You can then dry it out and use it like any other ceramic raw material (6c) or you can dip or apply it directly onto pottery or test tiles (7).
Basalt, Iridescence, and the Firing Process
Left: Iridescence, Basalt, and the Firing Process, Right: Lava Oilspot Glaze
In the course of poking around and looking at rocks in Idaho, one particular sample of basalt caught my attention. The iridescent vesicular basalt on the right an example of what I picked up. I became very interested in the question of why this material had a bluish iridescent metallic sheen – and why the rocks next to it didn’t. I speculated that since some ceramic glazes can be fired in ways to make them turn iridescent (raku firing, for example) it might just be the case that I could fire basalt in a way that it would turn out with the same lustrous metallic surface.
I then set about testing my theory. I started by making nine 8” stoneware tiles, which would all have the same application of the same ground basalt. I then designed a series of firing schedules where I would change two variables: 1.) Atmospheric Conditions Inside The Kiln – specifically whether I would keep the kiln in oxidized natural atmosphere or whether I would reduce the available oxygen by firing in a gas rich environment. 2.) Cooling Speed. Of particular importance in the color of ceramic surfaces is the speed at which a molten, melted glaze cools down and crystallizes when the burners are shut off and the kiln returns to room temperature. In this series of firings, I took careful notes, paying very close attention to both the atmosphere in the kiln and the rate at which I allowed the kiln to drop in temperature.
I did indeed find that I could reproduce a metallic iridescent blue sheen from basalt lava rock (see the tile in the middle). The trick was to fire the kiln normally, and then cool the kiln very rapidly to about 1000C (which is the stage in which the viscous, molten material starts to harden) and then hold the kiln at a steady temperature in a reduced oxygen environment for an hour or two, then begin a very slow -2 degree per minute drop in the same reduced oxygen environment until the glaze had completely solidified around 700C.
What I learned through this series of experiments is that the iron in basalt and other iron rich glazes is greatly influenced by rate of cooling and atmosphere. By manipulating the atmosphere and rate of cooling, I could affect the colors of glazes – thereby producing unexpected surfaces and colors. It was this research that then led me to develop all of the variations found in both of the installation pieces in this show. The glazes are the same- but the firing processes are very different.
Rhyolite/Basalt Glaze (Lava Oilspot Glaze)
Lava Oilspot Glaze
While it was exciting to work with basalt as a material, in most cases it left something to be desired as a functional, utilitarian ceramic surface. It had the tendency to run completely off the pots, and it often had a blistered, matte surface. Very few glazes in ceramics contain one singular material, sometimes a glaze recipe can call for as many as 20 different materials. I needed to add something to my basalt to make it more functional, and a breakthrough came after my Mineralogy class fieldtrip to Topaz Mountain, in Southwest Utah where I collected a 5 gallon bucket of Rhyolite gravel.
Rhyolite, which is another volcanic rock and it lies on the on the other end of the spectrum of igneous rocks. Rather than being high in Iron and Magnesium like Basalt, Rhyolite is very high in Silica and Alumina. In glaze chemistry, you can think about Alumina as the opposite of a flux. Rather than lowering the melting temperature, it raises it. Referring back to the local materials in this show, you might notice that I’m using Dolomite and Travertine to increase the melting and moving of glazes in the kiln. Conversely, I’m using Rhyolite to stiffen and slow down the melting of the glazes.
Often the first experiment to do with a prepared local material is to do what’s called a line blend. The five pieces on the shelf below are what are called test tiles, because it’s often not feasible to devote a piece of pottery to a glaze you don’t know much about. In a line blend, you move in steps from one material to another. The tiles below represent a progression from 100% Basalt , to 75:25, to 50:50, to 25:75, then to 100% Rhyolite. In other words, on one end of the line you have one material, in the middle you have a perfect mix of the two, and on the other end of the line you have the other material. You can move in big steps, which takes less time, or you can move incrementally. The point then, for a line blend is to help you narrow in on a nice proportion, and sometimes a second series will help you narrow it down further – say the 50:50 and the 75:25 test tiles look very promising, you might then decide to do a second progression from 50:50, 55:45, 60:40, 65:35, 70:30, and then 75:25. The possibilities are endless, and you can add in a third and fourth material to the blends and very quickly use up a lot of test tiles and explore a lot of variations. I’ve also included some of my notes, which cover only a few of the thousands and thousands of glaze tests I’ve mixed and fired.
I was lucky though and the first line blend yielded my Lava Oilspot Glaze. It’s 1 part Basalt, 3 parts Rhyolite. A very simple glaze recipe for sure. But remembering also that the firing and cooling have a great deal of influence on the finished surface, I’ve spent the last year investigating the possible variables on this very simple recipe with very, very complicated firing and cooling processes. The results of which are the 16 Rhyolite/Basalt Bowls, all of which were made from the 1:3 recipe, but fired in very different kiln cycles. I’ve also included some examples of several of my firing cycles.
16 Lava Oilspot Bowls
The Scanning Electron Microscope
Scanning Electron Microscope
My research with the SEM on campus began with a generous scholarship from the Office of Research and Graduate Studies. With my membership to the Microscopy Core Facility, I was able to take my own samples and prepare them for analysis on a state of the art Quanta Scanning Electron Microscope. Fen-Ann Shen, who oversees the SEM was a patient teacher, and she taught me first how to use the equipment on calibration samples, and then later, to prepare my own ceramics and begin looking at the surfaces and structures on the nano-scale.
Manganese Saturate Glazed Vases, SEM Image of Mn. Glaze
It should be said that an SEM is not an optical microscope – and by that I mean it’s not what you’d normally imagine a microscope to be, namely, a tabletop instrument with two lenses that you look in. While optical microscopes are useful for looking at surfaces, magnification maxes out at about 800-1000 magnification. An SEM, on the other hand, operates on the principal of firing a concentrated beam of electrons at a sample and analyzing the electrons as they bounce back (backscattered). Scanning is in the name because this beam moves across the surface of the sample, building an image as the resulting information is compiled. While an optical microscope maxes out at around 1000x, the SEM at USU is capable of 300,000x magnification. In effect, you can look at nano-particles in high resolution. That’s 1/1,000,000,000 of a meter! A human hair is about 100,000 nano-meters in diameter. It’s therefore quite easy to get completely lost in an area smaller than an eighth of an inch.
SEM Sample Mounts
The images in this exhibition represent some of the most exciting surface features and topographies from my own glaze. To date I’ve only looked at 3 glazes, and all of them are in this exhibition. I’ve included the actual samples themselves, which are mostly broken shards and chips of glaze. As I began to learn more about the equipment and preparation, I began to make samples specifically to fit on the small conductive sample mounts.
I might also add that these images represent the very beginning (I’ve spent less than 20 hours looking at my glazes) of what I see as a very exciting chapter in my exploration of materials and glazes. Most published images are the result of hundreds, if not thousands of hours spent in front of the monitor, patiently waiting for scans to complete. I was lucky, then, to capture the images I did, and I’m very excited to continue this research in the future.
Fiske Hare’s Fur 1
Fiske Hare’s Fur 2
Fiske Hare’s Fur 3
Lava Os 1
Lava Os 2
Lava Os 3
Manganese 1
Manganese 2
Manganese 3
Acknowledgements
A special thanks to The Office of Research and Graduate Studies along with The Caine College of the Arts for providing me with an incredible ART-STEM fellowship – without this funding, it wouldn’t have been possible for me to devote all of my time and energy to focus on my research. My fellowship has opened doors to departments across campus, and has facilitated a great amount of collaboration and research outside of the Department of Art and Design.
Thanks to the USU Ceramics Faculty for giving me a long leash to play around and melt things and make messes – and thanks also for reigning me in when I got carried away and always reminding me that I can’t fire kilns without actual work. Without craftsmanship there is no concept.
Thanks to my Graduate Advisory Committee for helping me decide what I should be doing, not what I could be doing. Thanks also to John Shervais and the Geology Department for help with my projects and insight into material science.
Thanks to Kenzi Lowry for help with the graphic design of my postcards and posters and helping me format the SEM images and get them ready for printing. Thanks for working under impossible deadlines and tolerating my constant adjustments and second guesses and indecisiveness.
Thanks to Fen-Ann Shen for training me on the use of the Scanning Electron Microscope and helping me figure out how to prepare and analyze my ceramic samples. I look forward to investigating more materials in the Microscopy Core Facility.
Thanks to Nicholas Gialanella for providing me access to the printers in Photography and working with me to produce the SEM images.
Thanks to Ryoichi Suzuki, who had a huge influence on my thinking about the possibilities of stone and for giving me access to the sculpture facilities.
Thanks to Miles Howell for his help in preparing and roughing out the stone bases – he got done in hours what would have taken me days!
Thanks to all of my graduate and undergraduate colleagues in Ceramics, for putting up with my messes and firings, and for inspiration and camraderie. Also, a shout out to the corner for the tough love.
A final thanks to The Department of Art and Design. Laura, Becky, Tori, and Janet, you’ve all been incredibly helpful and supportive not just in the run up to this show, but throughout my time at USU. Thank you!
I was beyond excited to work with my newest found material, a rhyolite from Topaz Mountain, in Juab Country, Utah. This time rather than choosing a handful of very large rock samples (to insure relative material consistency), I instead went to a wash and filled up a 5 gallon bucket with very fine material the size of course sand. My reasoning this time was that consistency is completely relative, and as long as I get materials from the same spots, it doesn’t matter – and I can grab material that has already been 99% processed for me. In the end I think this worked out, because I was able to run 5 gallons of sand through our ball mill with 2x 1 gal. ball mill jars in 10 batches. But I’m getting a bit ahead of myself, because I think it’s important to test fire a material before you go through the trouble of ball milling. So my new first step in dealing with materials (after identification of course) is to take a small chunk, put it in a small dish, and fire to cone 10 in reduction. Since this is my primary temperature range, that’s it, if there are chances I’ll also put similar samples into cone 6 oxidation as well as an oilspot firing schedule, which is about cone 12 oxidation. Here was the result at cone 10, in reduction:
A small rhyolite pebble after being fired to cone 10, in reduction.
Looks a lot like a fired chunk of granite or feldspar. Onwards with the milling!
Someone asked me about my process for ball milling, and here it is: Fill a 1 gal ball mill jar 1/3 with mixed sized media (approx 50% 1/4″ balls, 25% 1/2″ balls, 25% 1″ balls) then fill the jar with 1/2 gallon of water, then fill the the rest of the container up with material until it’s about 2/3 full.) If I had more containers I wouldn’t exceed filling the jar 1/2 way, but my circumstances are what they are, and I haven’t needed to change anything yet, such as it is.
In reduction, this rhyolite material was surprisingly similar to my ice crackle glaze. I think with very little modification (a small addition of clay, bone ash, and maybe a bit of frit) I’m nearly positive this will look and feel like a Kuan, ice crackle glaze.
Rhyolite Glaze on a high Iron clay body. Fired to cone 10 in Reduction.
Once I had all of my material milled, I let it sit overnight and then drained off the excess water, leaving me with a glaze slurry with an SPG of 1.58 (That’s 79g of material in a 50cc syringe). That’s only important if you want to know how much material you have per given volume. Since I was going to blend this with a basalt material that was also in solution, I needed this info. After taking the SPG of my basalt material, which happened to be 1.54, I did a simple line blend. On both sides are the materials by themselves, in the middle a 50/50, and on the left and right middle 25/75.
Rhyolite/Basalt line blend. Red stoneware (top row) and porcelaineous (bottom). Fired to cone 12, oxidation.
Pretty interesting results, I think. The big surprise was how sweet the 25% Basalt and 75% Rhyolite mix came out.
1 part Basalt, 3 parts Rhyolite. Fired to cone 12 oxidation.
Finally, because I was looking for an oilspot/tenmoku type glaze with this research, I should also detail my firing schedule. Here’s my current Blaauw gas kiln firing schedule:
0
time_temp 00:00 5
1
time_temp 01:30 200
2
time_temp 07:00 1160
3
time_temp 01:30 1200
4
time_temp 01:00 1220
5
time_temp 02:00 1230
6
time_temp 01:15 1252
7
oxidation 80
8
time_temp 00:08 1252
9
oxidation 150
10
time_temp 00:30 1220
11
time_temp 01:30 1200
12
cooling
13
time_temp 02:00 1000
14
time_temp 02:00 800
15
time_temp 02:00 700
16
time_temp 02:00 500
17
time_temp 02:00 300
18
time_temp 02:00 50
19
time_temp 04:00 50
Blaauw kilns have the capability of firing in extremely oxidized conditions – blowing in somewhere to the tune of double the amount of air needed for complete combustion. The default, and maximum air value is 200. An neutral flame is around 100, and a smoky reduction is something like a 70.
Basically, this program fires up to cone 6 in about 9 hours, and then goes slowly up to 1252C, reduces for 8 minutes, and then goes back to oxidation, drops to 1220 over the course of 30 minutes, then drops to 1200 over the course of an hour and a half. I’m still very much tweaking this schedule, which works very well for some glazes, and not so much for others.
View From Topaz Mountain, Juab County, Utah. Photo by Phil Konstantin
A few weeks ago the USU Mineralogy class took an overnight field trip to Topaz Mountain in Juab County, Utah. This location is known for an abundance of semi-precious gemstone, namely a champagne colored topaz, opal, and red beryl. Unfortunately, the topaz loses its color after exposure to UV radiation (sunlight) so the gemstones, although beautiful, aren’t super valuable.
Of more interest to me, of course, was the rhyolite material itself. After working quite a bit with the ultramafic (high in magnesium and iron) basalts from the Snake River Plain in Idaho, I was coming to the conclusion that I needed to add in silica and alumina to stabilize this glaze and keep it from flowing off of my pots as well as having a nice and glossy glaze surface. Quite by luck, I was in the perfect spot to find a material that was precisely what I needed to mix together with my basalt material to get something interesting.
In the end, I had a lot of fun busting open rocks and attacking the rhyolite outcrops with a 5 pound sledge. I took some pictures of some of the coolest, and largest topaz pockets, which are referred to as “vugs”. At the end of the day I filled up a 5 gallon bucket with this material and brought it back to the studio to go straight into the ball mill. More on the results in a later post!
A vug I unearthed filled with Amber Topaz.More vugs filled with the distinct champagne colored Topaz. Unfortunately these topaz lose color with exposure to sunlight.
From the paper ‘Geochemical evolution of topaz rhyolites from the Thomas Range and Spor Mountain, Utah. – Christiansen, Bikun, Sheridan, Burt, 1984
I got a lot of responses after my last post, where I made the claim that using zinc is hard on elements. I had some really interesting discussions with both John Britt and John Tilton on this subject, and I thought I’d share some of that info with you guys. Of particular interest was a tidbit from Britt where he mentioned that firing a zinc sample in oxidation leaves it unmelted (as the melting temp is 3500) while the zinc sample in reduction almost entirely goes away. Heres a fired sample from our glaze calc class, fired in cone 10 reduction. It was a thumbnail sized lump when it went in.
Zinc Oxide
To make a long story short, the juries out on whether or not zinc directly reduces the life of kiln elements. What’s most likely is that it’s a combination of complex volatilizing compounds released during the firing coupled with high temperatures (especially if there are programmed holds). An often overlooked variable is water. It could very likely be that the extremely hard water at my current and previous studios is the culprit. If you’ve ever looked closely at old workhorse kilns, some of the deposits near the lids and spy ports are similar to calcite deposits. Its not hard to imagine Calcium and Flouride attacking the elements.
Another variable to consider is that the kilns that I’ve had access to for my entire career have been heavily used community kilns. At research universities there’s a huge range of clays and glazes that go through kilns. I’ve also heard that barium, cobalt, and copper are also hard on elements. Given all these extra variables, I suppose the only real way to quantify if and how much zinc affects elements would be to fire two brand new kilns side by side for a 100 or so firings and then compare. Let me know if you have two brand new kilns you need me to test. I’ll be happy to help you out!
On a related note, John Tilton had some great info on kiln elements. I hope he doesn’t mind me sharing the info – it seems very useful. From an email from Tilton:
The zinc thing is somewhat solved by using heavier elements. I have 11 gauge KA1s in my newest L&L, and after 104 firings they are still standing nicely. 12 gauge seems to give about 200 firings, and 13 gauge 80. Normal elements, the 16 gauge or so, give between 18 and 35 firings, not worth using. I also fire only one or two pots at a time so the total zinc load per firing is probably less than if you stacked tightly.
So it looks like 11 gauge might be the sweet spot, though they do require length to be resistant enough, and maybe that translates into coils of larger diameter.
Finally, I’ll leave you with the Material description from Digital Fire. I highly recommend consulting digital fire for material descriptions, and if you have the means, purchase access to the software. So worth it. From Digitalfire.com
Enter the formula and formula weight directly into the Insight MDT dialog (since it records materials as formulas).
Enter the analysis into an Insight recipe and enter the LOI using Override Calculated LOI (in the Calc menu). It will calculate the formula.
Zinc oxide is a fluffy white to yellow white powder having a very fine physical particle size (99.9% should pass a 325 mesh screen). It is made using one of two processes that produce different densities. The French process vaporizes and oxidizes zinc metal, the American process smelts a coal/zinc sulfide mix and oxidizes the zinc fumes.
Ceramic grades are calcined, they have a larger particle size and much lower surface area (e.g. 3 square meters per gram vs. less than 1; however 99.9% still passes 325 mesh). Calcined grades are said to produce less glaze surface defect problems (although many ceramists have used the raw grades for many years without serious issues). You can calcine zinc on your own in a bisque kiln, fire it at around 815C. Calcined zinc tends to rehydrate from atmospheric water (and get lumpy in the process, calcining a mix of zinc and kaolin produces a more workable powder). Alot of zinc is used in crystalline glazes (typically 25%), because these have no clay content, they bring out the best and worst of both the calcined and raw materials. The raw zinc suspends glazes much better (the calcined settles out much more). The raw zinc takes more water, but since the glaze can thin out over time it is better to add less than needed at mixing time and mix thoroughly. The raw zinc screens better (although it can be a challenge to get either slurry through an 80 mesh screen).
Zinc oxide is soluble in strong alkalies and acids.
It can be an active flux in smaller amounts. It generally promotes crystalline effects and matteness/softness in greater amounts. If too much is used the glaze surface can become dry and the heavily crystalline surface can present problems with cutlery marking. Other surface defects like pitting, pinholing, blistering and crawling can also occur (because its fine particle size contributes to glaze shrinkage during drying and it pulls the glaze together during fusion).
Zinc oxide is thermally stable on its own to high temperatures, however in glazes it readily dissolves and acts as a flux. Zinc oxide sublimes at 1800C but it reduces to Zn metal in reduction firing and then boils at around 900C (either causing glaze defects or volatilizing into the atmosphere; note that electric kilns with poor ventilation can have local reduction).
While it might seem that zinc would not be useful in reduction glazes, when zincless and zinc containing glazes are compared it is often clear that there is an effect (e.g. earlier melting). Thus some zinc has either remained or it has acted as a catalyst.
The use of zinc in standard glazes is limited by its price, its hostility to the development of certain colors and its tendency to make glazes more leachable in acids (although zinc itself is not considered a hazardous substance).
Zinc oxide is used in glass, frits, enamels and ferrites. Zinc oxide is also used in large quantities in the rubber and paint industries; in insulated wire, lubricants, and advanced ceramics. Credit: Tony Hansen
Thanks to Tony, and John Tilton. Also a special thanks to John Britt for the feedback on my last post; the clarification on Feldspar (I was mistaking K200 for Minspar 200 – ignorant to the fact that K200 has been out of production for 20 years!) I’ve since edited my post on Cone 6 with this info.
Jeepster parked next to a clay bank with Mount Telluride in the background.
Back in the studio after a great trip over to Telluride, CO via Moab, UT. You better believe I scooped up some of this clay, ball-milled it, and made a slip. I also packed the jeep with a load of rocks and shit. More on that as the story develops!
Red Siltstone and Clay, Telluride, COThe San Juan Rocky Mountains.Moab Red Rocks
Manganese crystalline glazes (high alkali, silica, and alumina) are usually created by saturating a feldspathic glaze with between 15-60% manganese dioxide. During the cooling cycle, manganese precipitates out of the molten glaze and crystallizes on the surface, producing lustrous, satiny surfaces.
UNDERSTATEMENT: Manganese Dioxide is extremely hazardous to your health!!!
Breathing in Manganese dust when mixing these glazes or breathing the off-gassing vapor when firing WILL GIVE YOU PARKINSONS-LIKE SYMPTOMS BEFORE ULTIMATELY KILLING YOU, PAINFULLY. HEAVY GLOVES, DUST MASKS, AND VENTILLATION ARE CRITICAL.
Historical Information
There is a long history of lustrous, metallic glazes. The first examples are thought to be from the early ninth century in an around what is modern day Iraq. Archeological evidence suggests that early examples originated from Mesopotamia in Fustat, which was then the capitol or Egypt. The oldest surviving examples were often multi-colored stains and iridescent sheens derived from copper and silver compounds. These compounds were usually manufactured by dissolving coins into acids and then mixing the resulting solution with earthenware clay. This mixture was then calcined and then finely ground. The resulting pigment was then mixed with a carrier (usually lavender oil) and applied to lead or tin glazed pots and re-fired to dull red heat. The pots were then held in an extremely smoky reduction environment at various temperatures and lengths of time, which resulted in surfaces ranging from olive-green, brown, amber, orange, yellow, crimson, and a very dark red which was sometimes so dark as to look almost black.[1]
Although the history and development of reduced-pigment lusters is long and storied, it was a more or less consistent sequence. It isn’t until the 19th century that one starts to find examples of resinate lusters. This resulted in the development of materials almost identical to modern ‘liquid gold’ and ‘platinum’ lusters. In Europe in the 1870s a revival in the technology and development of luster glazes saw a further refinement of reduced glaze lusters, most notably in the studios of William De Morgan, Massier, Kähler, and Zsolnay. This notable shift was the result of the use of higher firing clays, which French ceramicist Louis Franchet believed could offer the complete range of earlier pigment-lusters, but without a lot of the trouble.[2] Aside from the obvious temperature differences, the main difference between pigment and reduced glazes is that glaze lusters are generally less subtle, less mellow, and offers a wider, more brilliant range of color.
Abstract
I began research on this project in an attempt to find a brilliant, iridescent glaze similar to Zsolnay’s famous Eosin glaze, which has a very obvious bright reflective rainbow iridescent quality. Initial research suggested that Zsolnay’s effects were the result of the thin application of copper, silver or bismuth to a pre-fired glaze – firing to fusion point, and then reducing the kiln atmosphere during the cooling cycle. This method is documented extensively in Greg Daly’s book Lustre. Having had some glimmers of success with iron saturate glazes in reduction cooling environments, I proposed a solution that did not; 1.) involve expensive silver or bismuth oxides, or caustic salts such as stannous chloride or copper sulfate, and 2.) involve a postfiring or overly exotic and difficult to repeat firing schedule. In the end, a satisfactory solution was some combination of feldspathic glazes with 30-60% Manganese Dioxide, following closely in the steps of David Shaner, Lucie Rie, Hans Coper, John Tilton, and historical Rockingham ware.
Definitions
Reduced-pigment luster. Nearly all historical luster made before 1800 fits in this category. The result of calcining copper, silver, and bismuth oxides with earthenware or laterite clays, and applying the resulting mixture to a maturely fired lead or tin glaze surface. The piece is then refired and held in heavy reduction at dull red heat allowing for a thin layer or metallic oxide to fuse with the surface of the glaze. After the firing, the earthenware is wiped away, revealing a nano-thick layer of iridescent metal.
Resinate luster. Usually made with dissolved gold, platinum, or other noble metals and suspended in an organic binder. Generally fired to a low temperature, with the organic compounds burning out and fluxing a thin, even layer of metallic oxides with the surface of the work. Developed around 1800, very common in industry, very toxic.
Reduced Glaze Luster. Generally higher porcelain and stoneware temperature. Usually cover the entire surface of a form. Relies on metallic saturated glazes precipitating out thin layers of reduced metallic oxides which deposit in a thin layer on the top of the glaze. Generally more brilliant and operate across a wider spectrum of interrupted light.
Technical Information
Materials: I found that nearly all of my iridescent surfaces contained some percentage of manganese. The exception is a traditional Tenmoku glaze fired in standard reduction, and then ‘struck’ at 1840F for 1:20-2:00 hours. Strike firing, or striking the kiln is a glass term which refers to increasing the fuel supply and thus creating a reducing atmosphere around 1800F. Initial tests suggested that manganese saturated glazes promoted richer iridescent surfaces regardless of a strike firing. Additions of other oxides were often counterproductive to glossy surfaces and generally resulted in unpleasant black, rough surfaces. Copper, Iron, Chrome, Nickle, and Cobalt were all tested alone and in conjunction from .1 -> 20%. The character of the underlying glass matrix of was usually beer bottle brown, so I tested extensively to change the color of the glass without effecting the iridescent surface – to date I still don’t have a simple solution to this problem. Granular Manganese seemed to produce brighter colors as well as promoting streaking ‘hares-fur’ effects in faster cooling, and acting as ‘seeds’ to crystal formation on slower cooling cycles. My ideal concentration of granular manganese was 2% and fine manganese dioxide at about 27%.
Most recipes called for 50-70% feldspar, and after testing all of the available feldspars, I found that Nepheline syenite promoted a much smoother, regular iridescence. Custer feldspar promoted iridescence across a wider spectrum, but promoted intense crystallization as to appear almost pixellated. Kona f4 promoted a more matte, golden green/purple sheen. Other feldspars promoted a lustrous brown glass with varying degrees of light to moderate iridescence.
The addition of silica promoted a lightening of the glass matrix, as well as a sugary, semi- shiny sparkling satin luster. Silica beyond 15% eliminated iridescence. Alumina additions to the glaze produced a semi-matt honey colored glaze.
I found that the clay body had a huge impact on the color and quality of the iridescence. The most successful clay bodies were grolleg based porcelains, with only the highest percentages of manganese based glaze recipes showing even the slightest luster on stoneware recipes.
Finally, glaze thickness was perhaps the most critical aspect of obtaining iridescence at high temperature. This was complicated as these glazes are extremely runny. Even slight overfiring resulted in glazes running off the pot. There was a need to find a balance between adding clay and silica to the feldspar and manganese without diluting the concentration of available metal oxides and feldspar. It was also extremely difficult to apply these glazes consistently, and fire them in such a way as to reach maturity without overfiring.
Firing: All tests were fired in high temperature gas kilns. I usually fired to 1260C, or Orton cone 10. A majority of my testing was in standard cone 10 reduction firing, with a 1 hour body reduction at cone 012-> cone 08, and a 6-10 hour firing from cone 08-> cone 10. Recipes with 15% copper produced a striking gold color in oxidation environments, and glazes in oxidation firings bubbled and boiled up between cone 7-9, which suggests a similar thermal reduction similar to oil spot glazes.
Cooling: Most of my firings were in small soft brick or fiber kilns, so the possibility of extended cooling cycles was limited. I found that crash cooling seemed to promote smoother, less brilliant surfaces, and a moderately fast cool was ideal in creating a balance between bright color and reasonably smooth surface. Longer cooling promoted larger crystals to a point, and excessively long cooling cycles promoted a matte surface. Reduction cooling remains an exciting possibility which mostly extended beyond the scope of my research. A very interested mottled crystal growth was observed on bottle forms cooled with a 3 hour reduction hold at 1840F.
[1] Caiger-Smith, Alan. Lustre Pottery: Technique, Tradition, and Innovation in Islam and the Western World. London: Faber and Faber, 1985. Print. Pg. 21
[2] Caiger-Smith, 1985, Pg. 177
[3] “Iridescence in Lepidoptera”. Photonics in Nature (originally in Physics Review). University of Exeter. September 1998. Retrieved April 27, 2012.
Bibliography:
Britt, John. The Complete Guide to High-fire Glazes: Glazing & Firing at Cone 10. New York: Lark, 2004. Print.
Caiger-Smith, Alan. Lustre Pottery: Technique, Tradition, and Innovation in Islam and the Western World. London: Faber and Faber, 1985. Print.Pg 149
Conrad, John W. Black Pearl and Other Saturated Metallic Glazes. Santa Ana, CA: Falcon Division of Aardvark Clay, 2010. Print.
Currie, Ian. Revealing Glazes Using the Grid Method. Australia: Bootstrap, 2000. Print.
Daly, Greg. Lustre. London: A. & C. Black, 2012. Print.pg. 131
Hamer, Frank, and Janet Hamer. The Potter’s Dictionary of Materials and Techniques. London: & C Black, 1991. Print.